A quest to Texturize
Today I spent the looking around the studio for a way to create textures for my model.
First I fixed my Maya to make sure that the model I was working on is suitable for exporting to the various software such as ZBrush, Unreal Engine 5, Substance painter
The Axe Model
This is the low poly version of the Axe created in Maya:


I created an Axe following a tutorial. The model is very solid itself and I'm happy of the way it looks.
I also created a high poly version of this model in Maya by bevelling the edges and making sure that the model was consistent

Texturing with Substance Painter
I followed this particular tutorial for baking.
I imported the Model in Substance Painter and baked the high poly version into it.

Once the model is imported it should appear in the screen with the UV

The next part is to bake the High poly into the Low Poly model


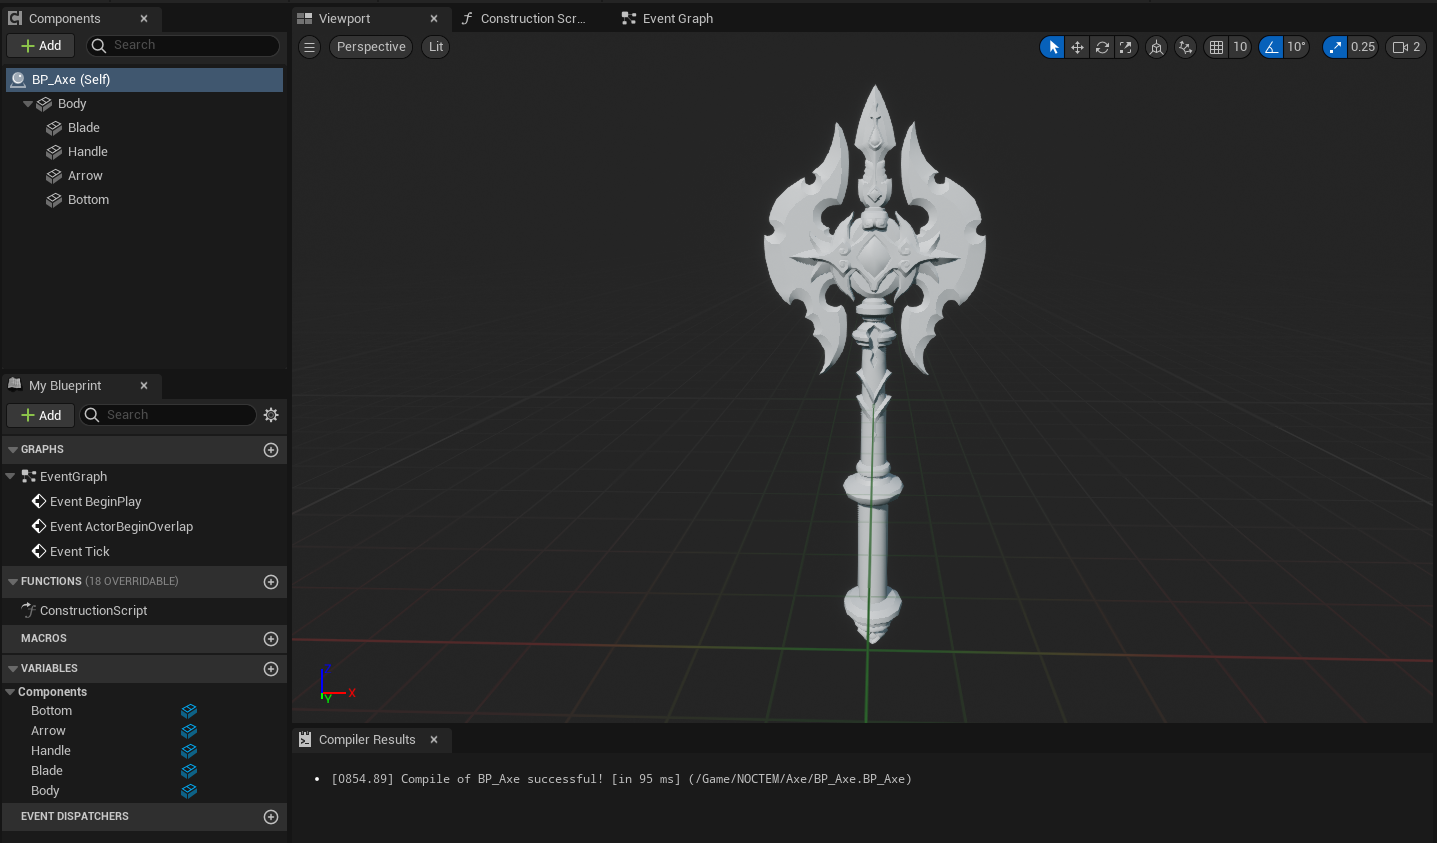
Axe imported in Unreal Engine


The battle with ZBrush
I also was greaten by this warm and welcoming list of messages:

Then I had to manually allow the folder to be accessed by ZBrush.

All of this was pointless, ZBrush keep on spamming me with messages every time I open the application.
I followed this tread to make sure ZBrush was running perfectly.
By Running as Administrator the error lists seems to have gone, but that was just an optical illusion. somehow I manage to still get into the application and set up my model.
ZBrush is more complicated than Maya and Substance, the user interface is more unique and strict.


I went into Geometry, then Modify Topology.


[F] to focus to the active model. then I added divide

The issue was in Maya as the Model was having more than 4 sided face and this was creating the holes.
here

and here

I went back in Maya and Fixed the Issue with the mesh clean up tool, and vertex connect.


I kept practising around with Zbrush and learning new tips and tricks.
Working on the Model


I then activate the Symmetry to be able to work on all face at the same time.

Were to import new brushes in ZBrush:

C:\Program Files\Pixologic\ZBrush 2022 FL\ZStartup\BrushPresets
Copy and Past the new brushes into this folder path, then open ZBrush
QUICK COMMANDS
A few useful commands for ZBrush:
[(comma key) (,)] – Close Lightbox
[Ctrl + N] - clear page (delete all)
[T] – Edit Mode
Hold [shift] + mouse button = SMOOTH EDGES
BRUSHSES
[B + D + S] - dam standard
[B + C + B] - clay build up
[B + S + T] - standard (generic soft brush
[B + F + A] - Flatten (simple flattening)
[B + T + D] - Trim dynamic (more natural flattening, good for after adding noise such as clay build up and wanting to have the below effect.)


Comments
Post a Comment